Showing posts with label DIY. Show all posts

Wednesday, June 26, 2013

Sewing tutorial: Floor Cushion (toddler)

 
A long, long time ago in a far away land known as life, I pinned this tutorial on how to make a pouf or floor cushion. With Cam's upcoming birthday I felt like I should make him something. Yeah, I know the bicycle and binoculars were cool and all, but I wanted something more personal. He always seems to love watching movies (or rather one, The Incredibles) so I figured a floor cushion/pillow would be perfect! (Next project is a bean bag!)
 
 
Materials needed:
 
* 1 yard home décor fabric
* 2 packages 1/2" premade piping
* contrasting thread
* 16-24 oz. fiberfill
* a napping toddler and approximately 1-2 hours
 
 
Step one:
Lay out your fabric and fold so that the shorter ends are together.


Step two:
Draw (w/pencil) a 17" diameter circle on the wrong side (or back side) of the fabric. Cut out; you should have two since the fabric is doubled over.
*Note: using a compass makes this step extremely easy


Step three:
Cut out two handles 3x12"
Cut one strip of fabric* (for the sides) 9x51.5"
*Note: this may need to be two strips sewn together (see next step)


Step four:
Sew the two 9" strips of fabric together if they aren't long enough.
I highly recommend sewing together at a point so that the fabric matches as best as possible. You'll thank me later.


Step five:
Pin piping to the right side (front) of each of the 17" circles making sure the raw edges of each are aligned.
 
Using a contrasting thread (to the fabric color), sew along the existing stitching on the piping. 
 
Sew piping on both sides (lengthwise) onto one of the handle pieces in the same manner.


Be sure to overlap the ends like so:


There's no such thing as too many pins:


Step six:
Finish the handle by placing the piece with no piping onto the piece with piping, with the right sides facing together/inward.
 
Sew around all edges along the existing stitching, except one of the shorter edges.
 
Flip inside out, fold edges inward, and sew open edge together (don't worry you can hide this stitching later).
 
 
Step seven:
Carefully lay the 9" side piece on top of one of the 17" circle pieces, right sides together facing inward. Don't pull too hard and leave about 1" on each short end free.
 
Pin the raw edges together around the circle and 1" free edges together.
 
Sew a 1/2" seam along the short edge to sew the sides together. Then, sew along the existing stitching to sew the side piece to one of the circles pieces 


Step eight:
Flip cushion inside out and position the handle where you want it on the right side of the side fabric. Sew into place leaving some slack.
 
*If you sew over the existing stitching to close the end of the handle, this will then become part of the "decoration" of the fabric.
 
* Sewing an X and double stitching the edges helps to reinforce/strengthen.


Step nine:
Flip inside out again and pin the second circle onto the raw edges of the sides. Leave an opening wide enough to turn inside out and fill with fiberfill.


Step ten:
Flip inside out and fill with fiberfill.


Step eleven:
Hand stitch closed and enjoy!


Here is another reason why it helps to sew the edges so that they match as best as possible (hiding the seam better):


This is so simple and takes 2 hours or less .. even with a beginner seamstress like myself (and no compass to make circles .. you don't want to know). Now go make your kid a movie pillow, or your neighbor's kid, or my kid. ;-)
 
**Edit/Note: If you have a toddler, surely you have a sit-and-spin. If not, find one and the bigger, bottom circle is about 18" so I used that for a second floor cushion and it worked great, but I'd use an additional inch or two for the side fabric, just in case the circle is a bit more than 17" around.**
 
Voila!
 

Monday, December 3, 2012

DIY: Felt Christmas Tree (for kids)

I found a great idea for a felt Christmas tree, to hopefully distract the curious toddler from the real tree. It was very easy, quick to put together, and Cam loves playing with it.
 
Side note: there's a 95% chance our Christmas tree will still be bare on the bottom 3rd anyways because of Mr. I-must-touch-everything in our house. ;)
 
 
The tree was the easy part, but it was a little time-consuming cutting all of the ornaments. I did make a few with pops of color using scrap pieces of a different color so you could do as much or as little as you have time for. I used a star and circle outline from one of Cam's many toy blocks/shapes. I just sorta free-handed the tree on a large piece of green felt.
 
 
Figuring out how to put the tree on the wall was the interesting part.
 
Felt doesn't stick to double-sided tape, trust me on this.
 
I decided to use hot glue and glue the felt to a thin piece of poster board (like the cheap $.97 kind from CVS). This was a great idea because it actually made the tree a LOT more sturdy anyways.
 
I thought about hanging it on the wall with command strips, however, we had a tradgedy from Camden's birthday party and still have yet to patch the wall. (Lazy, I know.)
 
I thought maybe some putty would do the trick without taking a piece of drywall with it, and voila!!! Worked like a charm! We shall see how long it actually stays up, but I'm thinking it'll be up for a while longer.
 
This is an inexpensive, fun way to let your toddler be involved in decorating and get in the holiday spirit!

Friday, September 28, 2012

DIY: Curtain Panels

Shopping for curtains always makes me turn into the crazy lady. Said crazy lady doesn't like just any curtain design or paying $80+ for some curtains she barely tolerates. So with my new sewing skills (not bragging, I finally figured out how to thread the bobbin so yeah..), I decided to make a few trips to JoAnn Fabrics to see what kinds of decor fabric they have. I'm really not sure what the different types of fabric are at this point nor do I really know what I'm talking about but I do know this is one of the easiest projects I've ever tackled with my sewing machine! I'm going to break this down step-by-step on how to make some beautiful curtains for your home.

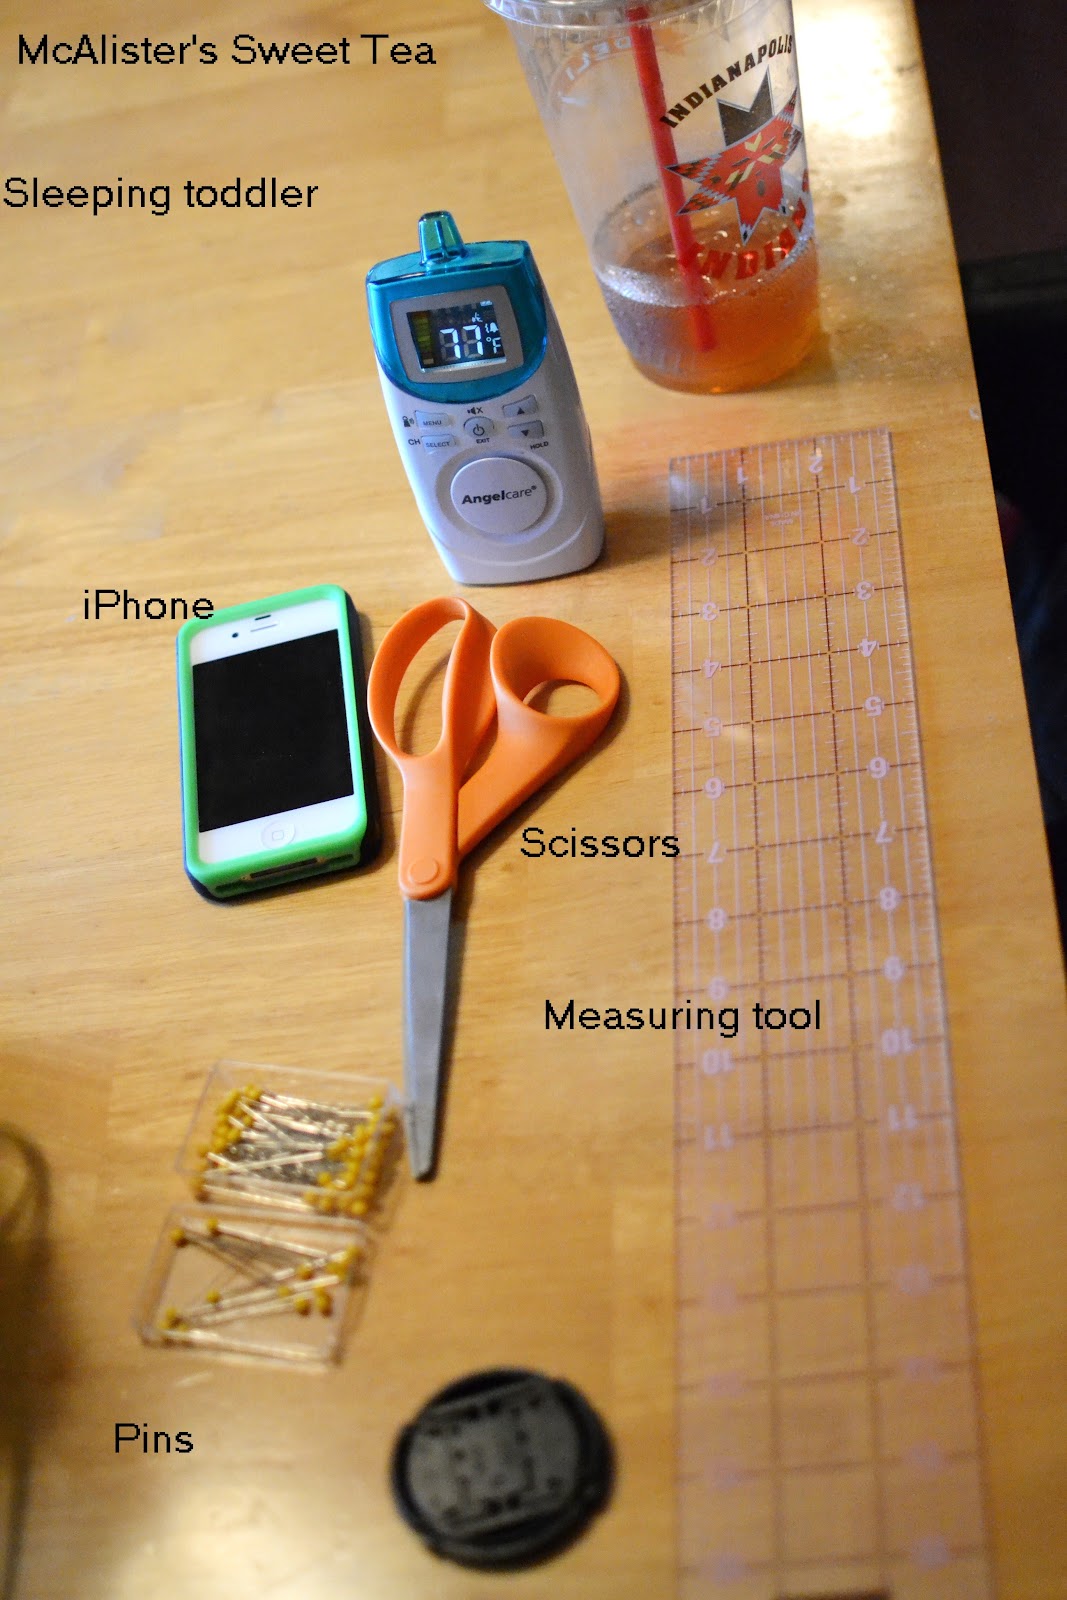
First, supplies:

~ 3 yards of 54" preferred fabric (2)
~ sewing machine
~ all-purpose thread in preferred color choice
~ bobbin
~ a good pair of fabric scissors
~ pins
~ measuring tool (measuring tape works just fine)
~ and the tools listed below...


.. Okay, so you don't need the sweet tea (athough I highly recommend it) .. ;)

And the iPhone is purely for music .. and looking up sewing how-to's on youtube.


Okay, so let's get started sewing! In the picture above, I have displayed a picture of the settings that I used for these curtains. It will probably be different for each different machine and fabric, so please play around with the settings with a scrap piece of fabric (same material) to adjust as necessary.

STEP ONE: Lay the fabric out so that you have easy access to the sides (do this one side at a time). 


STEP TWO: Fold over the edges about 1/2-inch and press with hands (or use a warm iron and steam press it for better results).


STEP THREE: Fold over the same edge again about 1/2-inch and press with iron again.


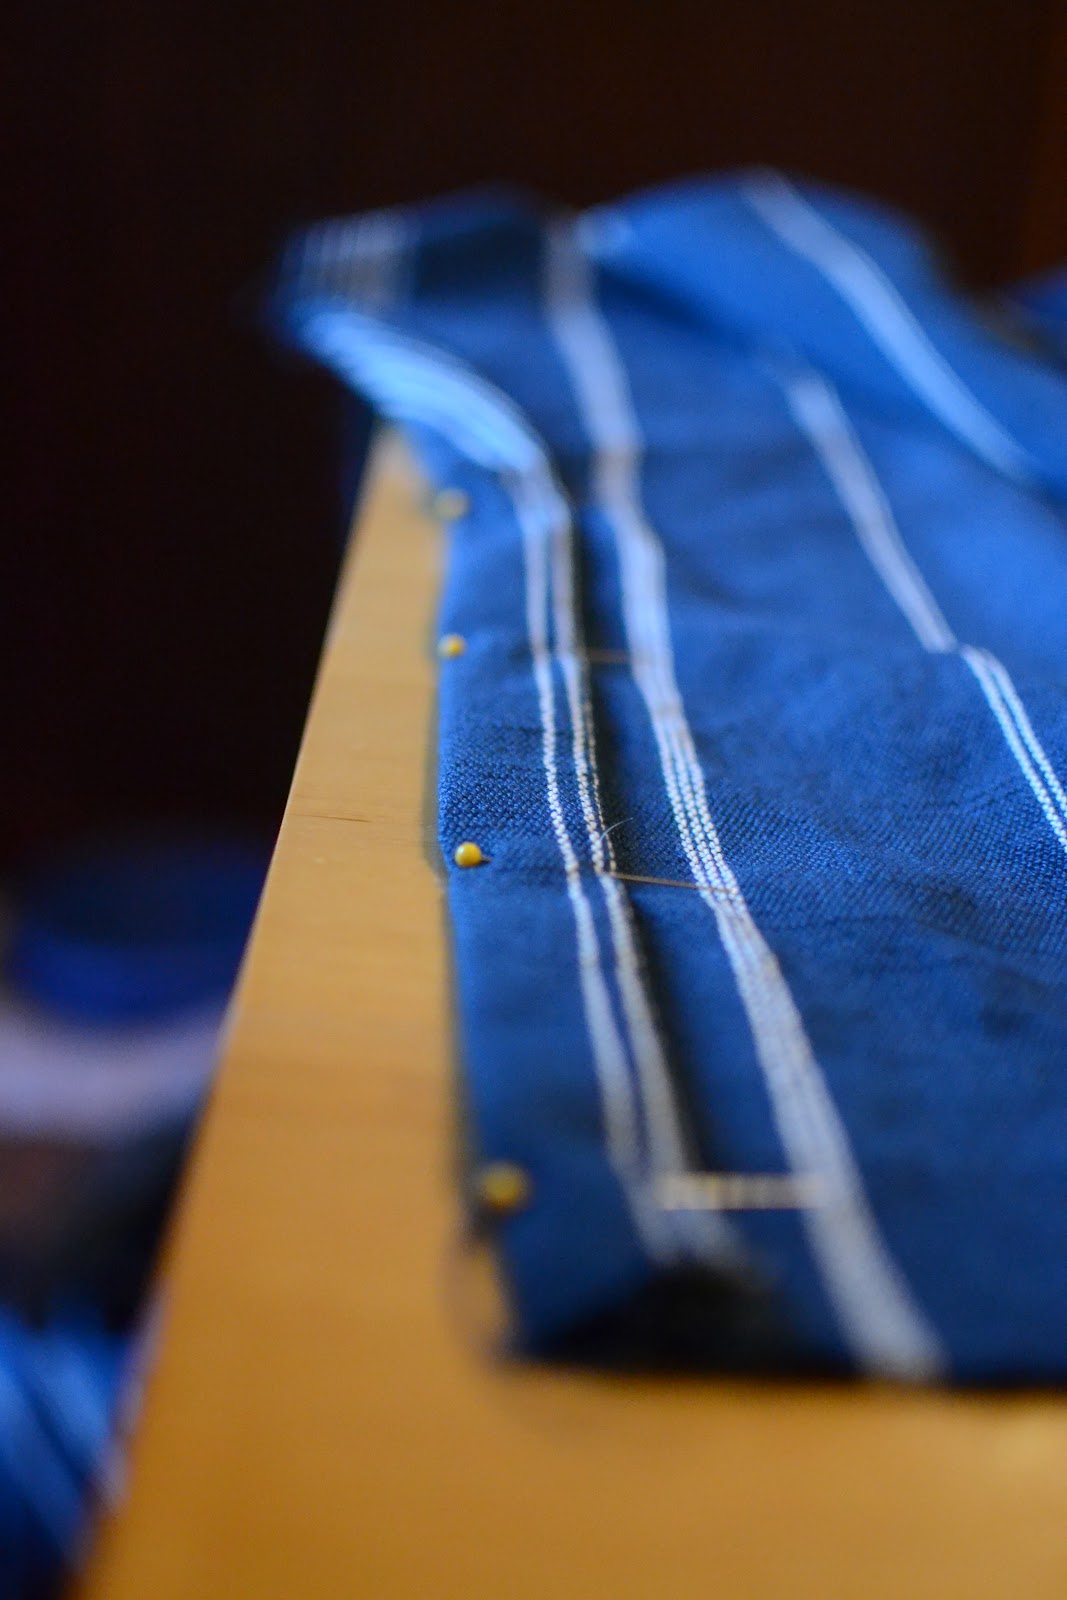
STEP FOUR: Pin pin pin! I cannot stress this enough! Pin everywhere and often. There is no such thing as too many pins.


Do this all the way down each side of the panel(s). 


STEP FIVE: Place the fabric in the machine and sew straight down the inside edge of the folded side(s). Sew this with the folded edges on top (so that you can see where you're sewing in regards to the edge of that fold).


Sew all the way down the edge(s) and don't forget to back-stitch at the beginning and ends!


Now to sew the top hem.

STEP SIX: Lay fabric on the floor flat with the folded edges facing up.


STEP SEVEN: Fold the top edge over by about 1/2-inch and press with a hot iron.


STEP EIGHT: Fold the top edge over again and make a 4-inch top panel. Steam this edge with the hot iron as well.


Be sure to measure because you don't want it to be uneven and look awkward.


STEP NINE: Take your measuring tool and slide it across the top of the panel and pin the top in place as you go. I preferred to pin the top and the bottom (just in case) but you'll only be sewing on the bottom.


STEP TEN: Sew a straight line across the bottom part of the 4-inch top panel. See red line in picture below.


You now have made a straight curtain panel for a rod!

 
STEP ELEVEN:
 
Cut the fabric to length. Add approximately 5-6 inches extra.
 
STEP TWELVE:
 
Repeat steps 7-10 for the bottom hem.

If you're like me, and want to take it just a step further to make it look "fancy", then I would invest in some grommets. They're very easy to do, only take a few extra minutes to put on, and give your curtains a little something extra.

 
Just a little tip from doing the grommets: I would suggest placing the two end (outside) grommets in place first and keeping them within about 2 inches of the edge because if it's too long, it will dramatically hang over and not look right. You'll thank me later for this little tip. :)
 
... and your final product ...
 
 
Easy, simple curtains.

Sunday, July 22, 2012

a mix "tape" of sorts

I'm feeling crafty lately, especially with all of the Pins that I've pinned on, well, you know the site. :) I definitely have been getting to some of them and my goal is to get one big one (that requires quite a bit of construction on our part) done in the next year; hoping by Christmas, but that might be pushing it.

Even with all the great ideas out there, I came up with one for a friend of mine's baby shower. Her and I have a "special" relationship and clsoeness that you want in a best friend. You fight, you make up. You have kids, you go 3 years without seeing each other. When you do see each other again, you scream, cry and talk like it's only been a week. (And that's why I love you, my dear!)

I thought I should make a funny CD of some songs that would make her laugh and just help her to feel better in these last few weeks of pregnancy. So, I made her a mix "tape" of some oldies.


I think when she first saw it, she thought it was a serious, relaxing CD of labor music. I laughed and told her she might want to read the enclosed letter before taking it to the hospital. ;)

The letter reads:

Dear Colleen, 
I know that labor can’t be an EASY thing, but I wanted to give you a CD of some songs to keep you from getting too HOT BLOODED at the hospital.
Please be sure to check your car and make sure you have more than just ONE HEADLIGHT working, because you never know when you’ll go into labor. (Although I WISH we could get a schedule or something. Just one of those THINGS THAT MAKE YOU GO HMMM.)
When you check into the hospital, with JACK AND DIANE, make sure you tell them that you’re here to have a baby. (You know, since you’ll look smokin’ hot so they won’t know.)
Just keep your eye on the prize: e.p.i.d.u.r.al. It’ll feel like you’re on a MAGIC CARPET RIDE. At that point, the nurse will probably tell you that TIME IS ON MY SIDE. Just stay calm and listen to EVERY LITTLE STEP the labor & delivery staff tells you to follow. At that point, there’s no turning back. Just keep telling yourself that this is 2 LEGIT 2 QUIT.
I just know that you’re going to be thinking you wish you had a girl to call YOUR WOMAN, but count your blessings because GIRLS AIN’T NOTHIN’ BUT TROUBLE. Here’s a suggestion for Adam in the delivery room: once the baby comes, it’s completely appropriate to run around the room fist-pumping while screaming, “WE ARE THE CHAMPIONS.” (Trust me…)
Now even when you see that adorable baby boy’s face, there’s NO DIGITY (NO DOUBT) that you will get HUNGRY EYES. My advice would be to tell Adam, “KEEP YOUR HANDS TO YOURSELF” and concentrate on what a wonderful, complete family you have. And for goodness sake, pour yourself a glass of RED RED WINE!
Always my love,
Kelly


If you hadn't noticed, some of the words/phrases are bolded and in all capital letters. Yes, those would be the songs (in order) that are on the CD that was enclosed. She loved it! I even made a copy for myself because the songs are too funny. :)

The easiest way I did this, was to start with a couple of songs and try to write the letter. With each new song that I found on my Brad's iTunes play list, I tried to make a sentence with it and then put it in order on the CD where it appeared in the letter. That way, the letter made more sense when reading it.

I'm not the craftiest person in the world, but I hope this inspires you all to do something nice for somebody else or just to be creative on your own.

Saturday, December 3, 2011

How to make a diaper cake

I received a diaper cake for my baby shower and thought that it was one of the best gifts I could get. You are definitely going to need diapers as a new mom! I had some leftover Huggies Size One's so I decided to make my own diaper cake. I made it differently than mine was made and certainly there are lots of different ways to do it. This seemed like the easiest way to me. It only took 70 diapers and about 20-30 minutes to make the cake itself. Decorating is totally up to you how far you want to go!

Here is what you'll need:


One large cardboard round (about 14" diameter)
70 rubberbands (or less, there's a little trick I'll post)
70 diapers, size one (the size they'll need the most of)
Double-sided tape (or normal tape if you're cheap like me)
1 bottle (champagne, baby shampoo, etc) - optional

How to assemble:

Start by placing the diaper vertical on a flat surface and rolling it from the bottom up in a tight roll.


Next, place a rubberband around the middle holding the diaper in a tight roll. The corners will probably stick out, but this is okay. Do this with all remaining diapers. Note: To use less rubberbands, simply roll half the diapers and leave the rest for future step.


Place the bottle, if using, in the middle of the cardboard round and tape down. It won't be secure so don't worry about that. Then, place a few diapers around the bottle. Secure diapers around the bottle with a rubberband. It's okay if some fall out.


Next, pull the rubberband back and stuff the empty space with diapers. Note: If you want to, you can use the diapers that have no rubberband by simply rolling them tightly and placing on the inside of the layers. The outside diapers (the ones you see) should be bound with a rubberband to make it more secure.


Fill in as many diapers as you'd like to complete the first layer.


The next layers are just as simple. Place a rubberband around the bottle and stuff with the desired amount of diapers. If you want to, you can also do this without the bottle using three dowel rods to secure the cake.


Make as many layers as desired and voila! Diaper cake is complete! For added stability you can use the double-sided tape and tape underneath of the bottom layer to the cardboard circle. Now you can decorate however you'd like!

To do a simple decor, you can add travel size baby shampoo and lotions with the double-sided tape. Another great idea is also to cut a 1" thick ribbon to fit around each layer and use the double-sided tape to secure it to the layers, covering the rubberbands. Some people also add rolled up plain, white onesies in various sizes or even a small stuffed animal. If there is a theme to the shower, I'd stick with that!

Sunday, October 30, 2011

Photo Editing

Now I'm no expert on photo editing (or taking pictures either), but with most of my food blog photos I have to edit them to look more enticing. Also, with pictures of Camden I want to frame, they've got to be edited usually too. Taking pictures of a squirmy baby doesn't always produces the best picture right away.

I've read several of my favorite food bloggers suggestions and tips (always shoot in natural lighting if possible, crop when necessary, adjust the black and white, etc). From those tips I have discovered that picture editing does not make the picture what it is. You've got to shoot a decent photo, which is in the eye of the beholder of course. Editing is for enhancing the color and cropping mainly.

Take the pictures below for example. I'll leave them linked so you can click to enlarge them.

Before Editing

After editing

My first photography class in middle school taught me one thing: to get the proper exposure in your pictures, make sure you can see the whitest white and blackest black in the picture. That was the best advice I could have ever gotten!

For the picture above, I increased the brightness, shadows, contrast and highlights a tad bit. Then I messed with the black and whites to make them "pop out" more. If the color is off, you can always mess with color, tone, etc too, but I didn't edit that here. It took me all of 20 seconds to edit this photo .. with a FREE program on my computer. I know a lot of people use $300+ Photoshop, which is great if you can afford it. If not, use what you have. On my computer I have Windows Live Photo Gallery. From there you have basic editing and can even make black and white pictures.

So use what you have and mess around. I just figured out in the past few days how to enhance the black and white in the pictures so you'll never know until you try something out.

Friday, October 21, 2011

Finger Paint Recipe

I looked up several recipes from a few different websites for finger paint. I had an idea to send my nephew a card since he's still young and we wanted him to know we were thinking of him. The easiest recipe also got some of the best reviews on this site and so I went ahead with that one.


The recipe called for cornstarch and water, something I always have on hand. Cornstarch naturally thickens food when heated so I thought this would be a great recipe to try first.


You simply mix 1/3 cup cornstarch with 1 cup water and heat to boiling. Add the food coloring after it has cooled a bit.

I actually used a lot of food coloring and it still wasn't as dark of a color I would have liked. The mixture will thicken as it heats, too. The mixture got to this point (above) even before boiling so I'd probably use half as much cornstarch and reduce the heat a little for the next attempt.


I added some red food coloring (Camden's favorite color) and smeared it all over his hands. :) He wasn't freaked out and luckily didn't try to eat it. It was really hard, however, to keep his figers spread out since he wanted to keep his fists closed. We did a test print on the white paper (mostly for us), then tried the card we sent to his cousin Elijah.


The finger paint ended up thickening up way more than was necessary and after about 30 minutes it was totally gelatinous and unusable. I would definitely try another recipe for next time. I'm so hesitant to use kool-aid because it stains your fingers so easily.


He was tired since he had just had a play date and it was bed time so he looks less than enthused. He did really well and didn't resist though. I am thinking once he starts eating food we'll try again since none of the recipes I found used anything toxic.